
 Log In

Supporter
Range Officer

Range Officers
May 2, 2009
 Offline


Ok, here's the deal. We all want a smith to work on our DW's, but realistically there is nobody out there we trust. I'd send one to cylinder and slide, but quite frankly, I'm not sure they would know what to do with one either.
Soâ¦â¦ I've been saying I'm going to do itâit's time to get started. I'm going to take a highly neglected Monson 15-2 and give it the âAverage Joeâ home work-over. No special tools, no big budget, just me and the workbench. Hopefully I'll be able to provide a pictorial / process that everybody here can use. I'll be using the standard instructions that have been posted on the site, (and I'll re-post them here).
1) Unload gun
2) Using the special spanner wrench, remove the barrel nut. Then slide off the shroud and unscrew the barrel.
3) Remove the grip screw with an Allen wrench and slide the grip off.
4) Remove the two Allen sideplate screws. (Note: they are different lenghts)
5) Vibrate off the sideplate by tapping the grip stud with a nylon hammer or wood screwdriver handle.
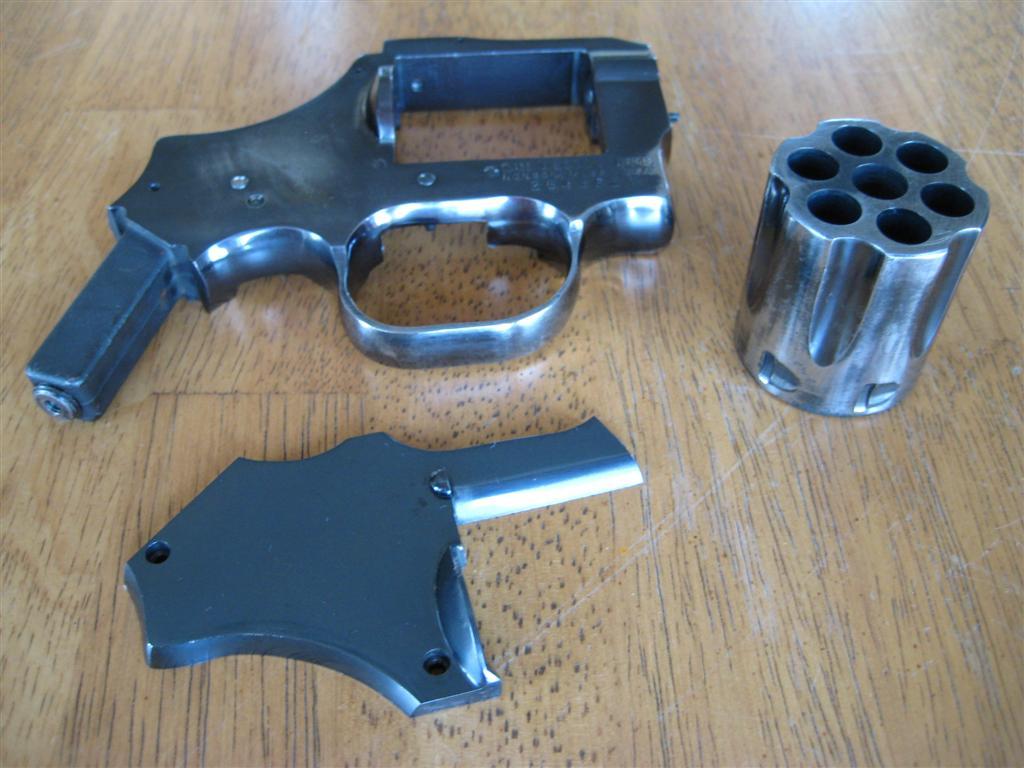
6) Just in front of the trigger is a small wire like, horseshoe shaped clip. Lift this up and out with a magnet or tweezers. Now open the cylinder and slide the cylinder/yoke assembly to the left, and out of the frame.
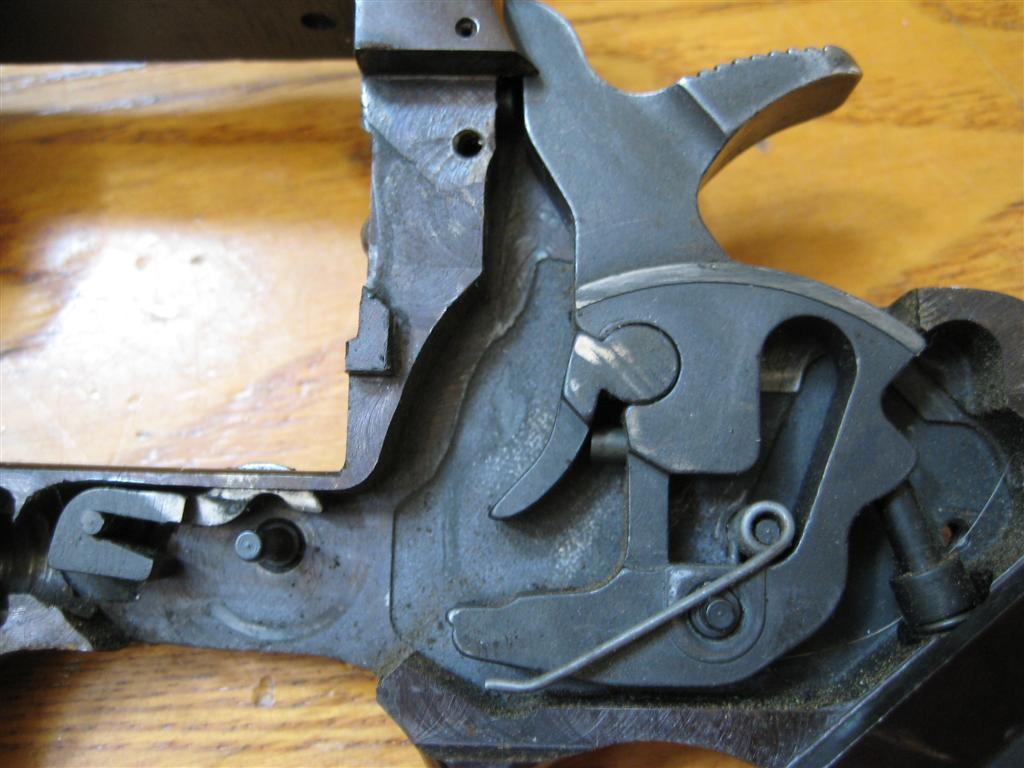
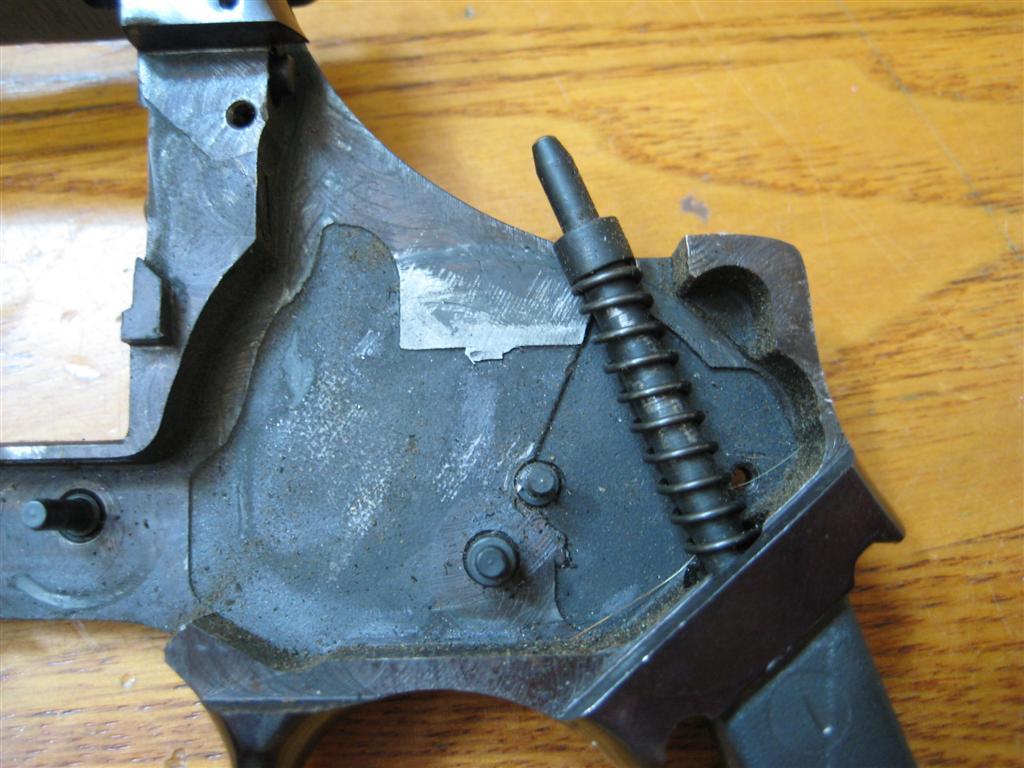
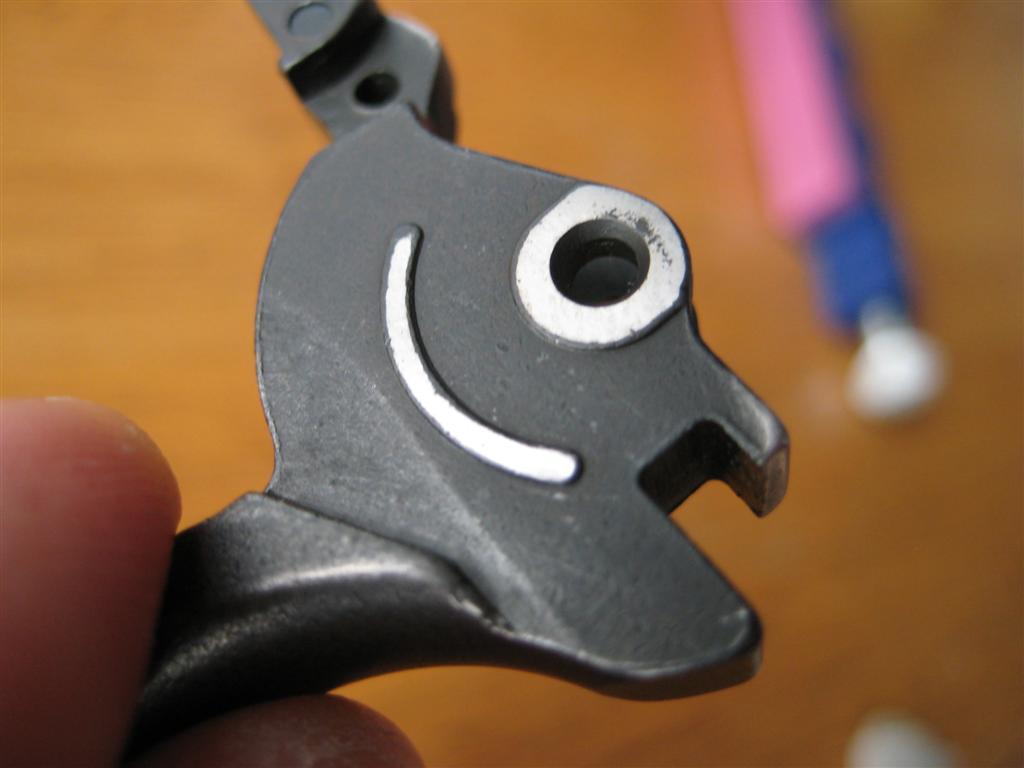
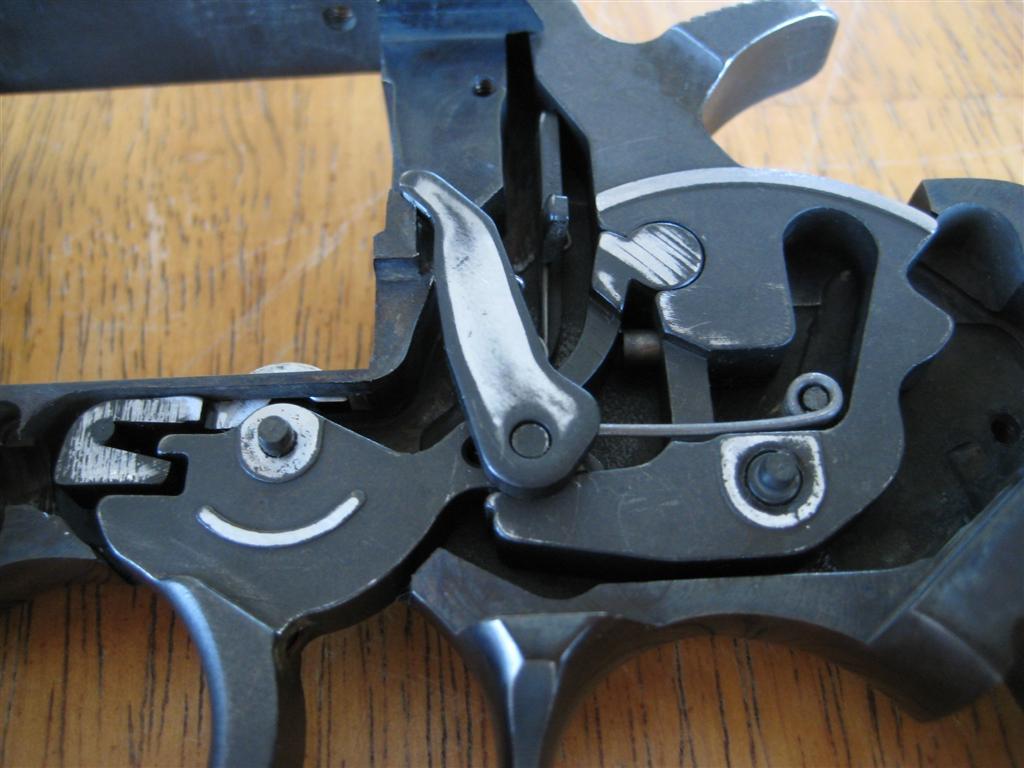
Okay, now stop and study where all the parts belong. Take a picture if needed. Pay close attention to the cylinder hand and transfer bar and especially the little spring that connects them.
7) Remove the cylinder hand by lifting it up off it's post and moving it to the left. Note how the tail end of the transfer bar spring fits into a small grove on the back side of the hand.
 8. Use tweezers to unhook the forward end of the mousetrap style trigger return spring from the ledge on the trigger.
9) Lift out the trigger and then the transfer bar and spring.
10) Push the cylinder stop (bolt) down to clear the frame and then lift it out to the left.
11) Grab the forward end of the trigger return spring again, and lift it over the hammer stud. This should completely remove it's tension.
12) Hold the hammer all the way to the back and insert the long sideplate screw into the hole in the bottom of the grip stud. Screw it in. It's going into the bottom end of the mainspring strut and captures it in place.
13) Lift the hammer and trigger return spring out.
14) I put the treaded end of a cleaning rod over the top end of the mainspring strut, and push down to hold the tension of the mainspring. While the holding the tension, unscrew the sideplate screw from the botttom. Slowly let up on the rod until the mainspring has relaxed and remove the mainspring strut and spring.
Now that you have a bench covered with parts, here's what I do to smooth the action and lighten the trigger pull.
1) Install a set of Wolff reduced power springs, especially the trigger return spring. http://www.gunsâ¦â¦â¦.prings.com
2) Polish the inside of the sideplate. Don't worry about removing any deep tool marks, just make it smooth.
3) Polish the sides of the hammer below the frame line (the part that doesn't show).
4) Polish the sides of the trigger above the frame line.
5) Polish the flat bottom of the cylinder bolt and the top of the trigger where they rub together.
6) Polish the inside flat of the frame, especially around the hammer and trigger bosses.
Note: All polishing is done with a couple small hard Arkansas stones and a few strips of crocus cloth. Don't change any angles or remove any decernable amout of metal. Just shine up the areas where parts rub together.
Put it back together and test fire. 1st time through, you may want to skip the polishing and see if the springs alone are enough for what you want.
So, let's meet the guest of honorâ¦.
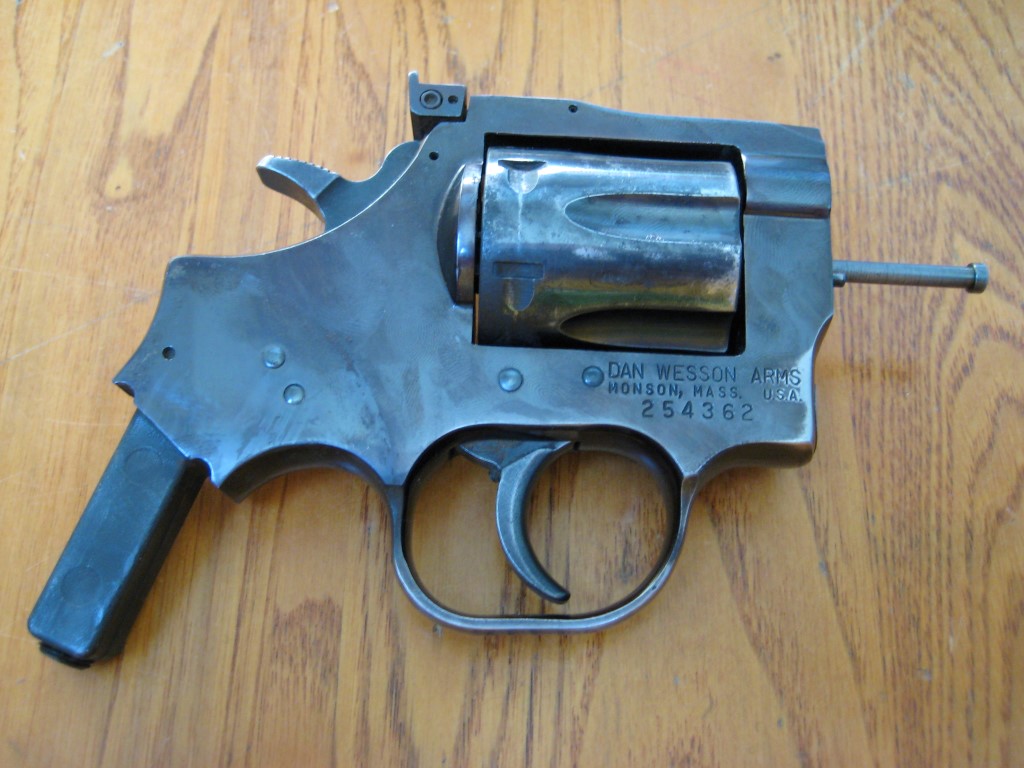

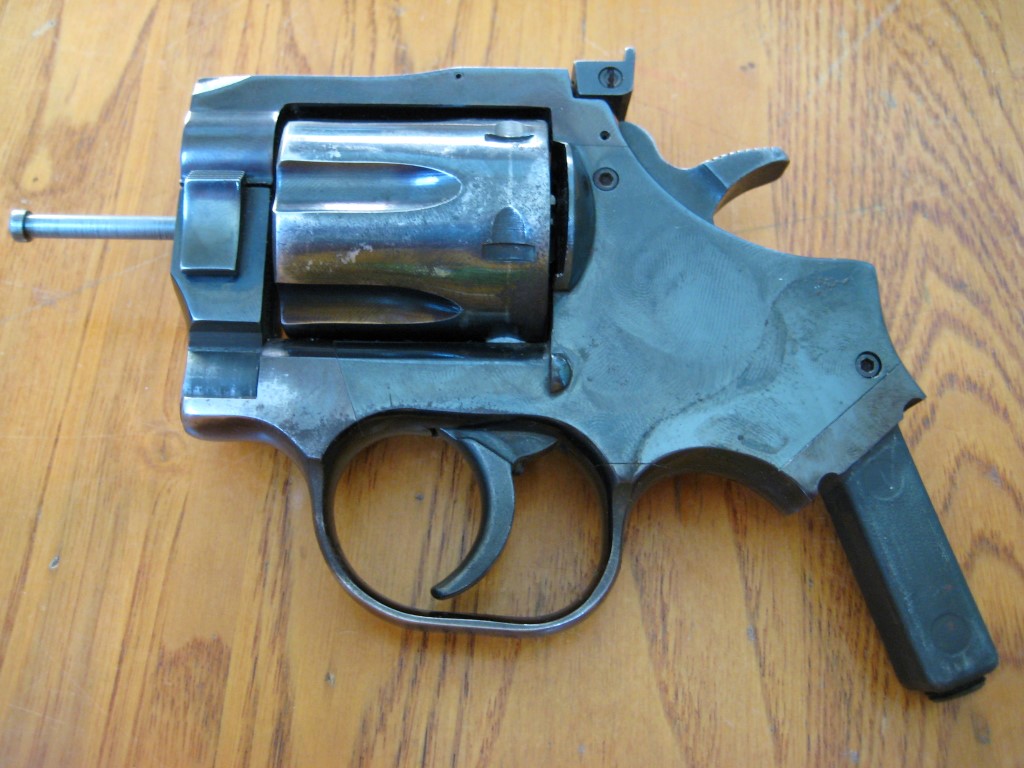
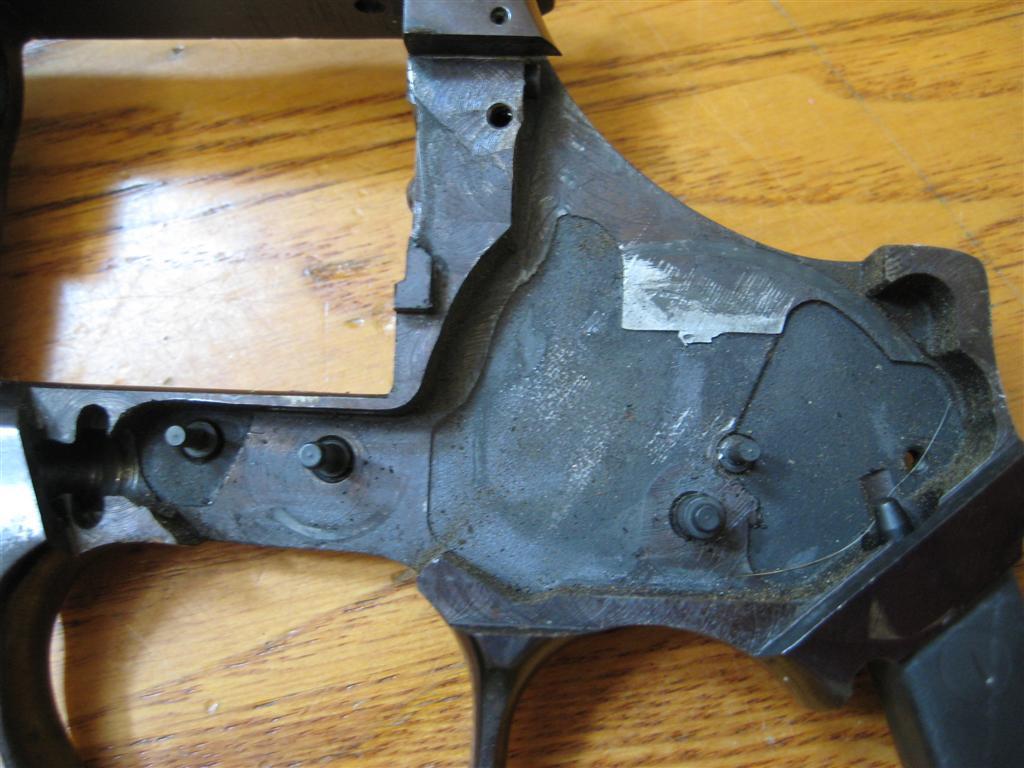
She has a lot of bluing wear, the barrel threads are pretty loose (not sure what to do about that yet), and even some rust in a few areas. But, she is salvageable. The only Money I plan on investing is a set of Wolff or CZ springs.
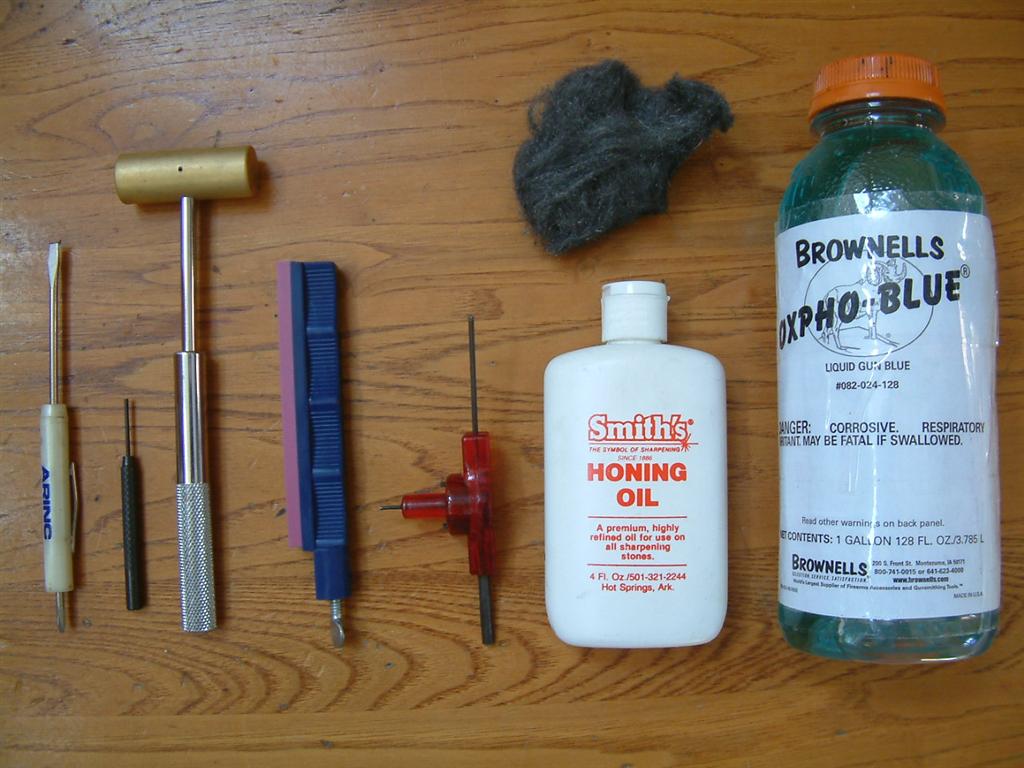
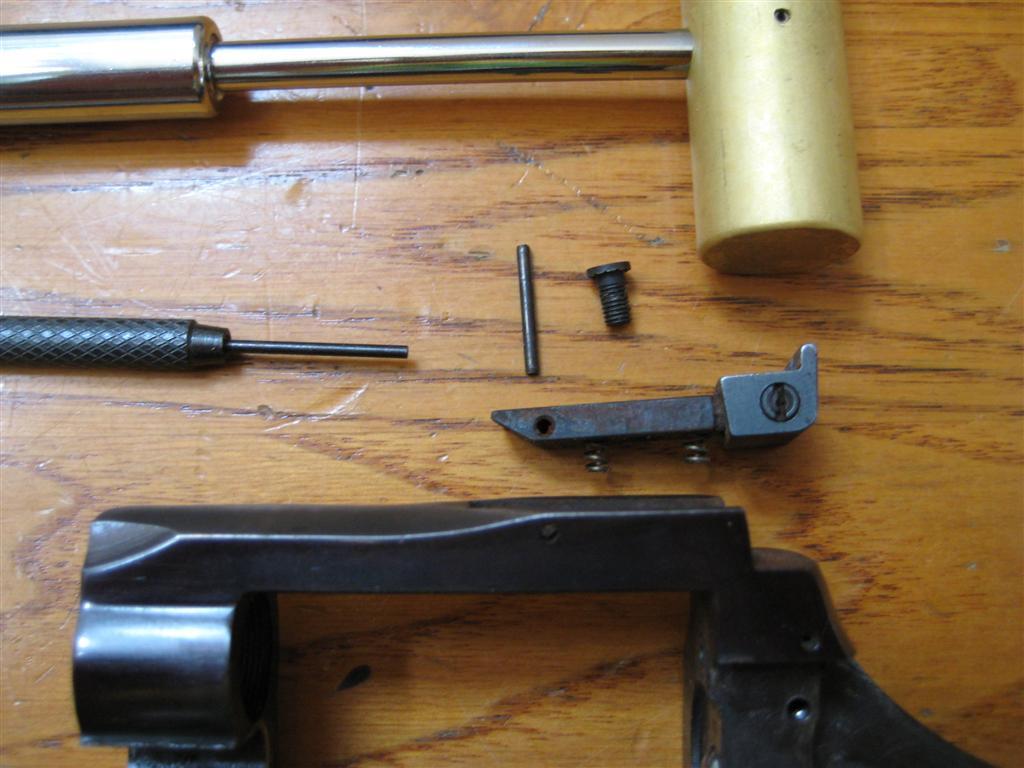
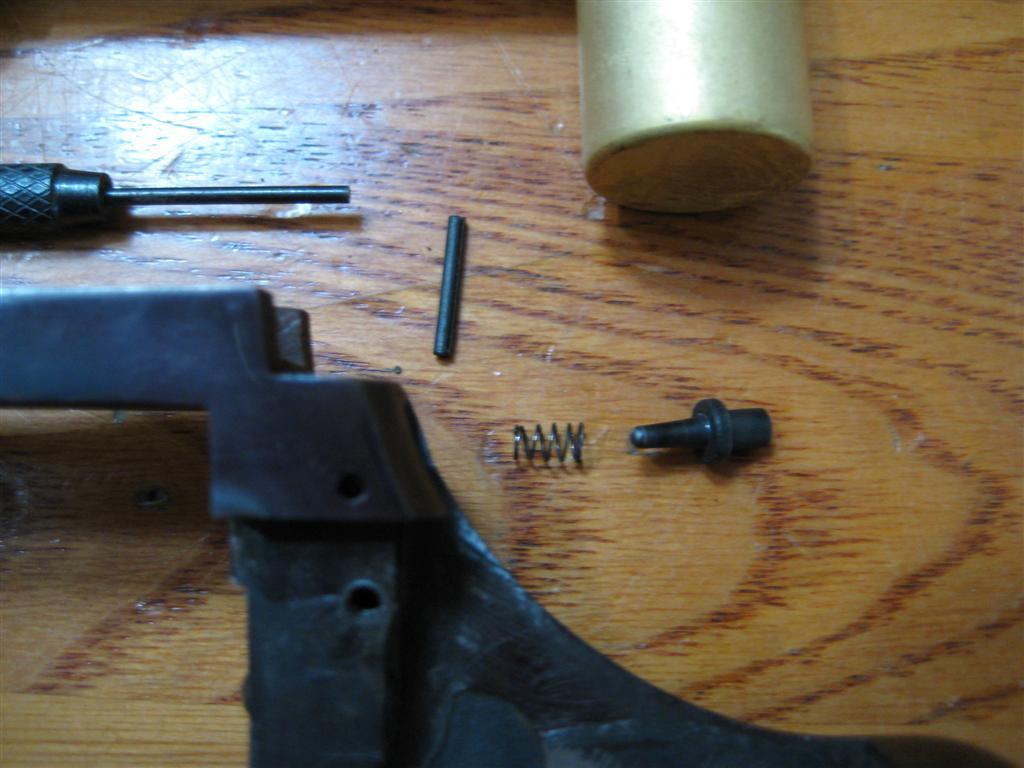
These are the only tools required to complete the entire job, and of course new springs if you decide to replace them.
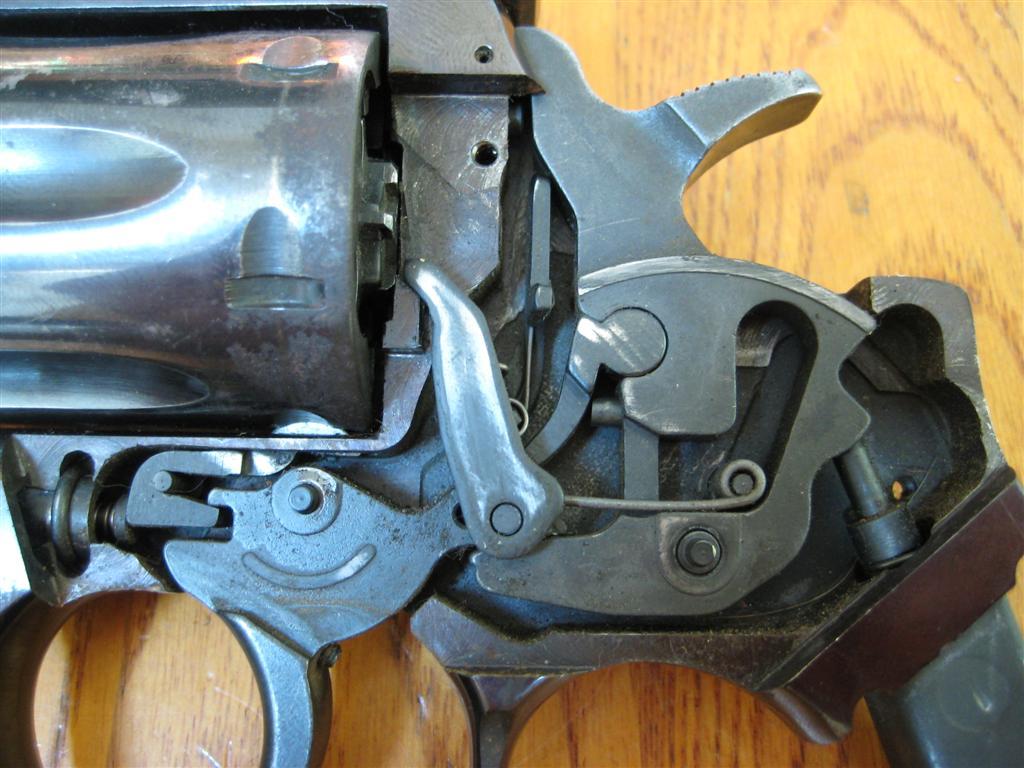
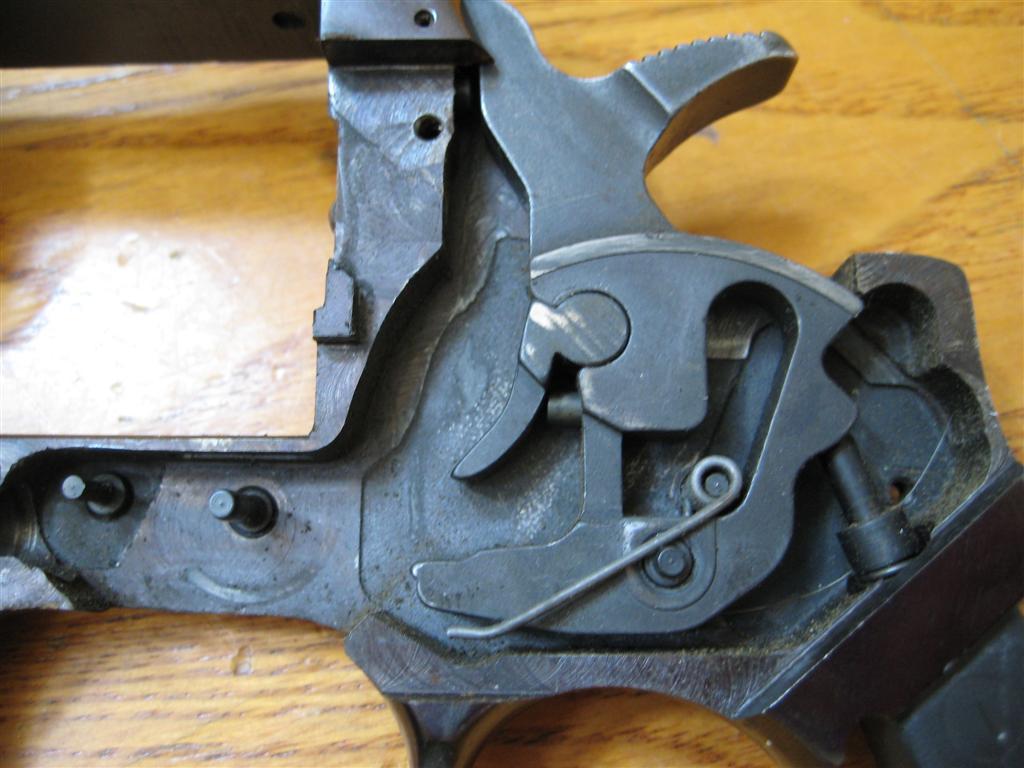
And one with the hammer cocked back. More rub spots on the frame under the hammer. Take a look at the trigger spring in this pic (short end behind hammer boss). You'll need this for re-assembly.
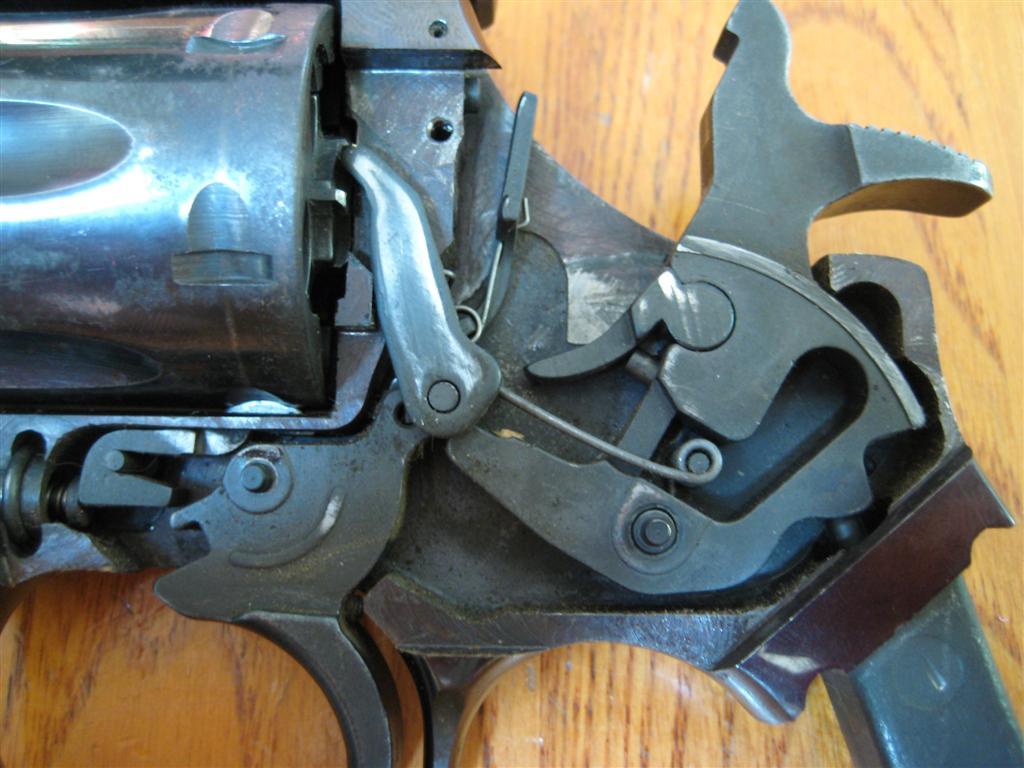
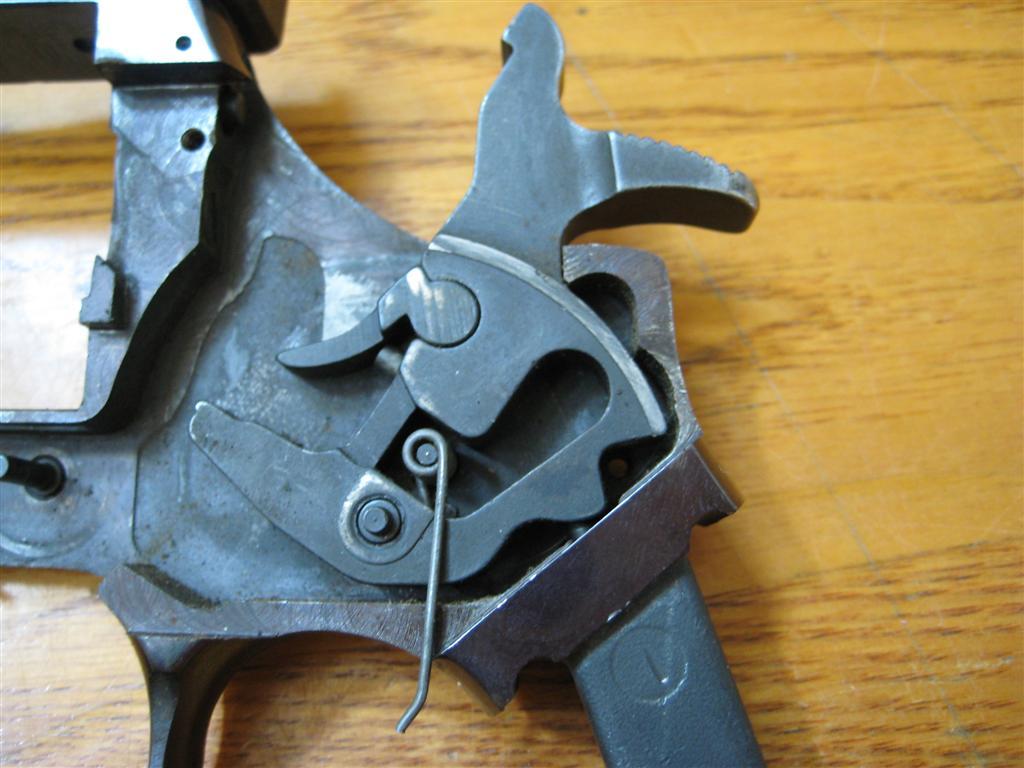
Remove the small half moon clip and you will be able to slide the cylinder out to the left. As you can see this gun is filthy inside.


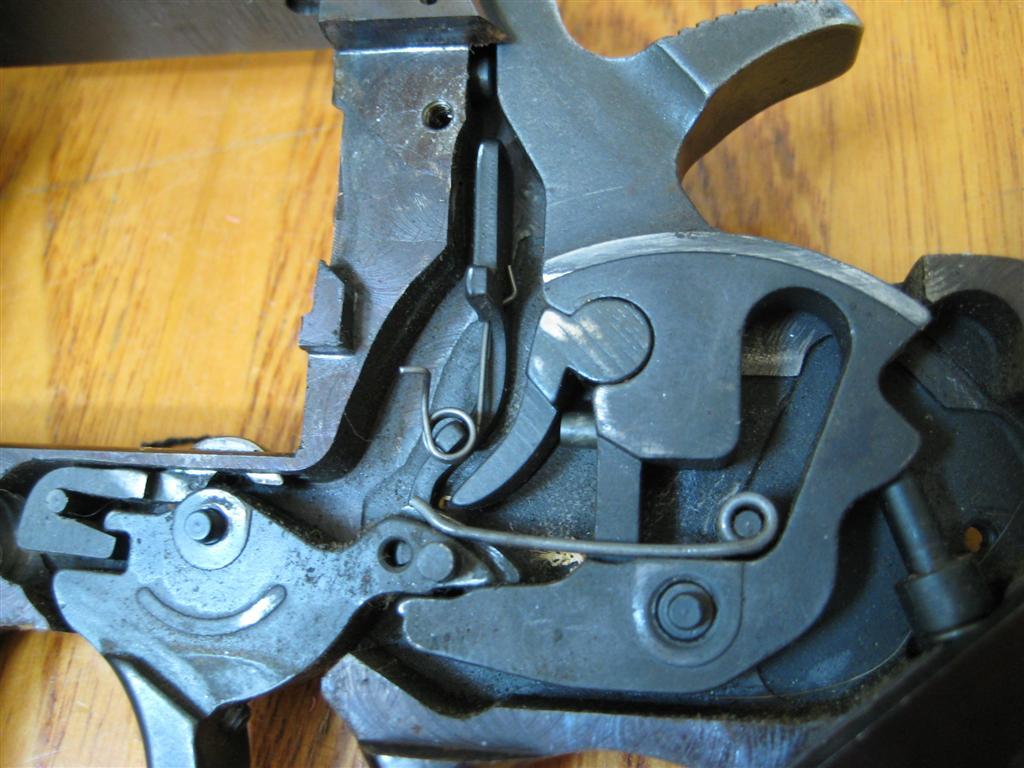
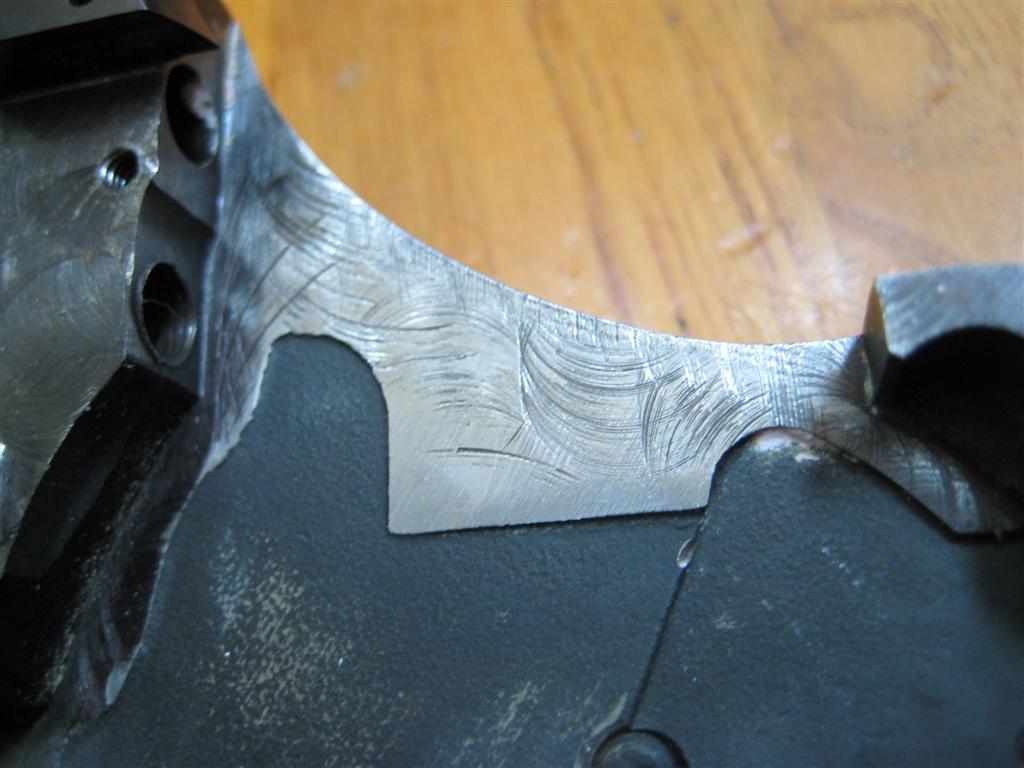
Take a look at thisâthose are some heavy duty factory gouges you see(after polishing). I polished the surface with a pencil eraser in the drill press and brasso (it's now smooth as glass on the surface of the gouges).
Like I stated earlierâI'm trying to keep this project within everybody's reach. Just everyday tools nothing fancy. Here's my tools â a Lansky knife sharpening stone (extra fine), and some honing oil. It gave excellent results.

The trigger work took some time, but the results were impressive. The factory black coating is extremely rough compared to the newly polished surface.
So let's switch gears for a minute (I'm tired of using the stone on tiny parts!). As I mentioned earlier, this gun had some rust spots, so cleanup was with the Dremel and a wire wheel followed up by 0000# steel wool. The cylinder was bad, so it got hit with 600 grit emery cloth.
 Now I'm off to give it a quick blue job using Brownells Oxpho-blue. In my opinion Oxpho is the finest/easiest cold blue on the market.
I won't show each part being polished, but the bottom line is I polished anything that moved against something else! You can't get all the scratches out, but it is super smooth now.
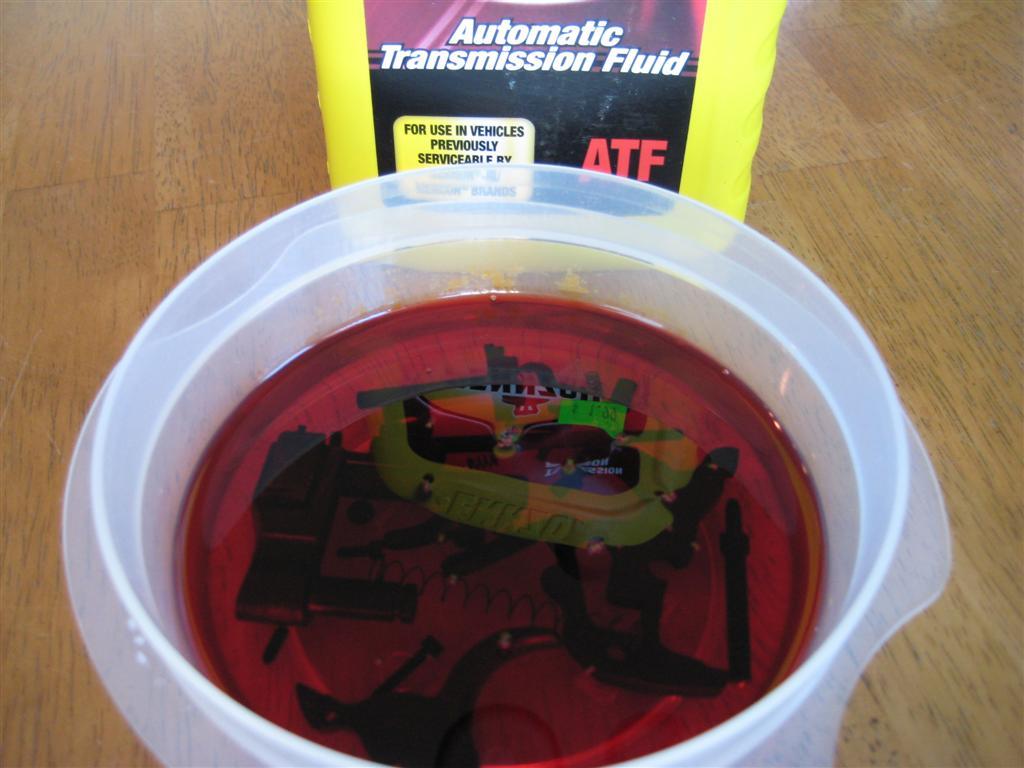
All the small parts got a quick blue job, and then take a bath in my favorite gun lube until the new springs come in the mail.

Where in !#$% is the !#$% mail !!!
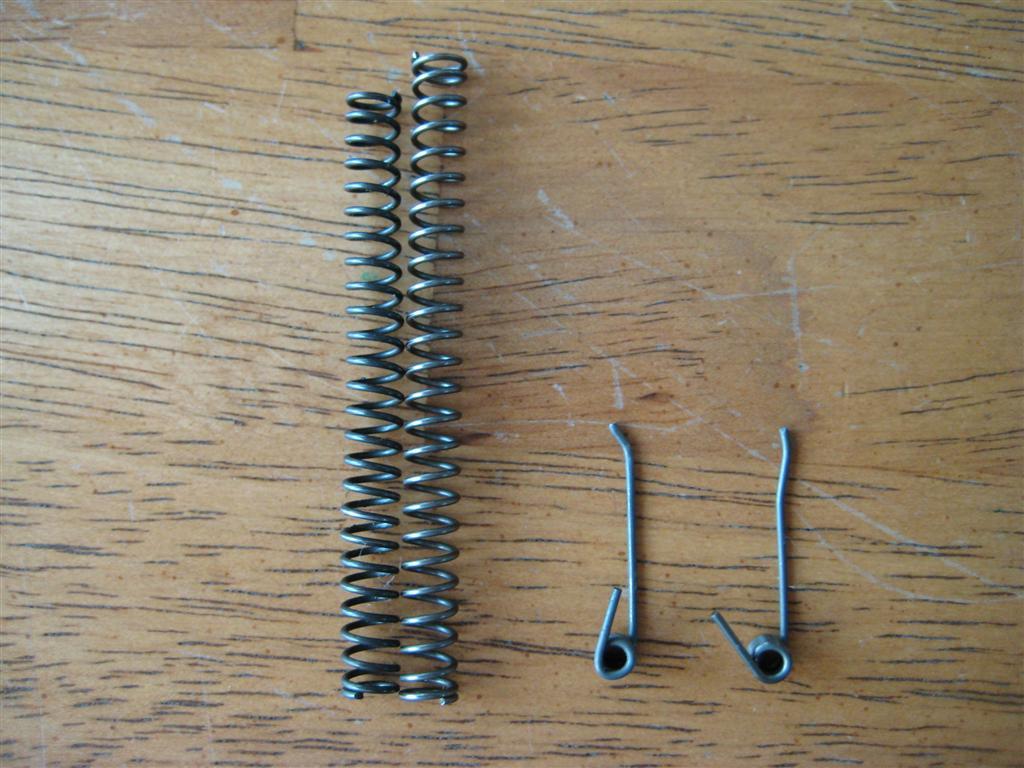
Springs finally showed up! The stock springs are on the left side, the Wolff on the right. Notice the difference in the angle on the trigger return spring. I went with 7.5 lb on hammer and reduced weight on the trigger.
Assembly is straight forward-just reverse the steps. The only thing to be watchful of is to make sure the short end of the trigger return spring goes behind the hammer boss(you'll know if it isn't). ***Don't over lubeâThe parts are so smooth you will have cohesion problems with too much oil***
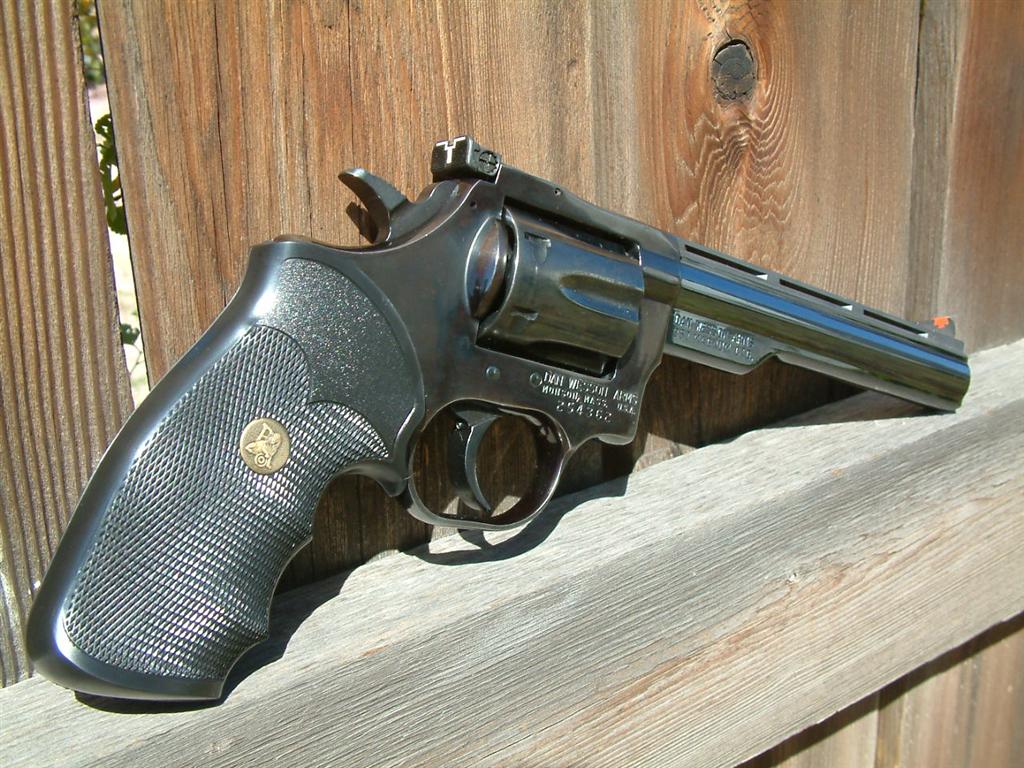
I slapped on a set of Grippers and a new Millet white outline rear sightâShe's a shooter!
Is it better..? It sure feels smoother, and it is DEFINATELY QUIETER. Double action still stacks (nothing you can do about it), but it pulls much smoother the whole way. I'll be doing it to the rest of my DW's for sure. Read the posts below for questions and answers.
SHOOT

Dans Club
March 2, 2008
Offline
Very nicely done SHOOT. I'm ready to do this on my next little project. Do you recommend the Wolff springs over the CZ/DW's?
BTW- Pinned at the top of this Forum, seems like most of us can use this info readily at hand.
I went to a bookstore and asked the saleswoman "Were is the Self Help Section?" She said if she told me, it would defeat the purpose.
George Carlin

June 3, 2009
Offline
Great piece of work SHOOT. There's a couple of things in there I will do this weekend.
JH
 Model 15-2V 6" Blued
Supporter
Range Officer
Range Officers
May 2, 2009
Offline
John Hunter said:
Great piece of work SHOOT. There's a couple of things in there I will do this weekend.
JH
Dang-- You're going to get done before I even start . If you have any questions, let me know.
SHOOT

January 22, 2008
Offline
Excellent post! I will pin this to the top of the forum.
Edit: Steve has beat me to the Pin!

Supporter
Range Officer
Range Officers
May 2, 2009
Offline
Steve CT said:
Very nicely done SHOOT. I'm ready to do this on my next little project. Do you recommend the Wolff springs over the CZ/DW's?
BTW- Pinned at the top of this Forum, seems like most of us can use this info readily at hand.
I'm a Wolff fan, but that's just me. I've never had a problem using Wolff springs in any of my guns, so I'm kind of stuck on them.
SHOOT
Supporter
Range Officer
Range Officers
May 2, 2009
Offline
Steve CT said:
Looks fine, could you add a note on the size punch you used ?
I used a 1/16" drift punch--I'll update the instructions also.
SHOOT

Supporter

Moderators
January 24, 2009
Offline
Wow, those sure are some rough machining marks in that last pic. They're dug in from every angle, too. I really think that's the handiwork of some individual, because the smooth factory machined surface looks just fine.
Whatever it was, that tool was either extremely coarse, or extremely dull & beat up.
Supporter
Range Officer
Range Officers
May 2, 2009
Offline
Charger Fan said:
Wow, those sure are some rough machining marks in that last pic.
They're dug in from every angle, too. I really think that's the handiwork of some individual, because the smooth factory machined surface looks just fine.
Whatever it was, that tool was either extremely coarse, or extremely dull & beat up.
Could be, but the rest of the internal machined surfaces look the same way and they still have bluing on them. The internal frame polishing is going to take some extra time and attention. I'm thinking dull cutter also, because there are a lot of burrs on the edges of the machined areas.
SHOOT
Supporter
Range Officer
Range Officers
May 2, 2009
Offline
OK guys-- She's all done and the difference was worth it. A couple of pointers to consider:
If you can't get the sideplate off-- pull the hammer back and CAREFULLY insert a wooden dowel inside the frame and SLOWLY apply pressure until you see the sideplate start to move; it pivots out from the rear and hooks in the front.
Don't plan on a certain time to accomplish this--detailed polishing takes a LOT of time--I did one piece per night while watching a few hours of TV. There's a reason Gunsmiths charge so much for their time!
The hand seems to be one of the more critical items to polish. It makes a lot of contact with the sideplate (polish inside of sideplate also). Mine was so smooth it was like glass on glass; this caused a problem with cohesion due to too much lube (cohesion was stronger than hand spring). The hand was not engaging the cylinder. I stripped some lube and no more problems.
Remember it's not just about the trigger surfaces, everything works together, especially in double action. I pulled the crane/cylinder assy apart also and cleaned/lubed it.
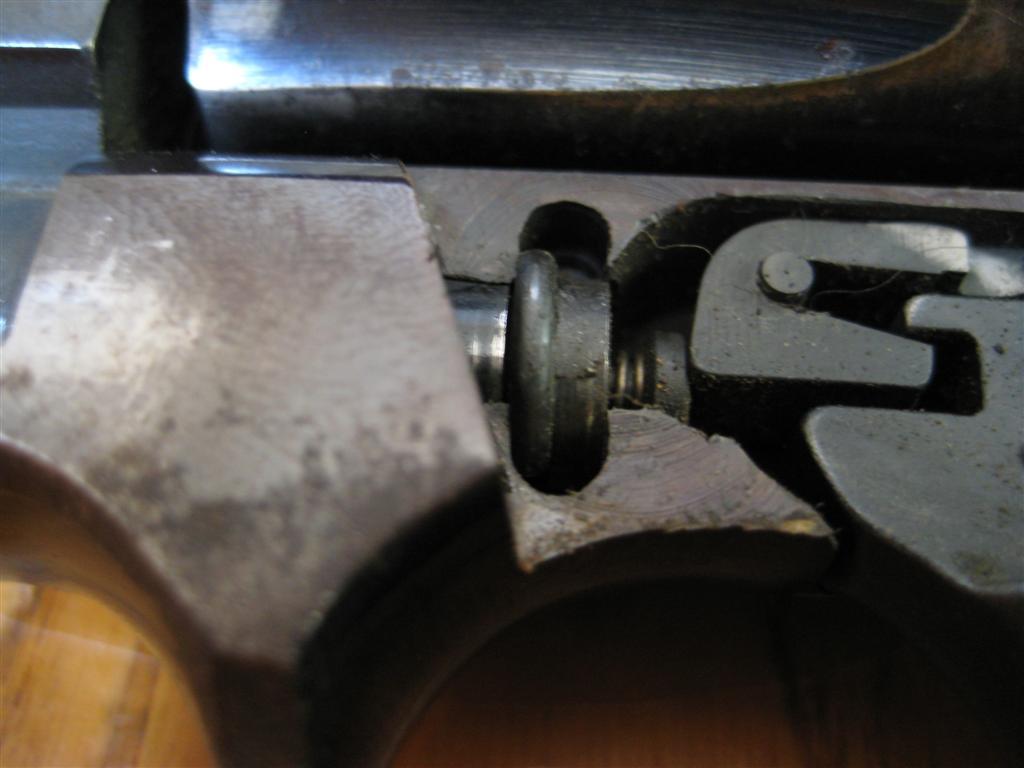
I only tightened the screw on the cylinder ball until it was flush with the frame--no point in putting too much pressure on the cylinder.
When you are polishing the cylinder stop, take your stone and lightly hit the top corner edges of the stop--that sharp edge is what causes the cylinder drag line.
When I was adjusting the trigger stop screw it happened to be at the exact point where it almost stopped the hammer from going back--not sure what that means, but my trigger breaks and stops perfect.
I'm no expert, so if anybody has any suggestions/comments, please post them here.
NOW GO START POLISHING YOUR DW  !!!
!!!
SHOOT
January 22, 2008
Offline
Shoot, excellent follow up! It might be nice to have a picture of all the tools you used laid out as well (just a thought).
Supporter
Moderators
January 24, 2009
Offline
Excellent tutorial & very nice work! I'm half tempted to try that myself on something...as soon as I decide on a victim.
It's interesting how the Oxpho blue coats differently on the cylinder & the frame. One must be a little more porous then the other?
Supporter
Range Officer
Range Officers
May 2, 2009
Offline
Charger Fan said:
Excellent tutorial & very nice work!
I'm half tempted to try that myself on something...as soon as I decide on a victim.

It's interesting how the Oxpho blue coats differently on the cylinder & the frame. One must be a little more porous then the other?
I've done a lot of bluing over the years and steel hardness has a lot to do with how blue takes. The cylinder was more of a bare metal prior to finishing, wheras the frame was highly polished except for the rusted bare areas. The pic makes it look worse than it is. To be honest, the hammer strut did not want to take any blue--it must be really hard (no idea why). Oxpho Blue is a great product--I have a rifle that was completely rusted, and my Oxpho job looks better than the factory job.
SHOOT

June 9, 2009
Offline
I just tried this tune up on my model 15. I didn't do as thorough a job, but I spent a couple of hours polishing the internals. I also replaced the spring with some Wolff reduced weight springs. Even before I put in the new springs, I noticed a difference in the smoothness of the action with just the minor polishing I did.
I had a chance to take it to the range today to try it out. With the 7.5 lbs mainspring, it's very pleasant to shoot. I had no problem setting off primers shooting DA with Remington UMC .38 spl FMJ plinking ammo.
When I bought this Dan Wesson a few months ago, it was obvious it had not been very well taken care of. There was a lot of lead fouling and other junk in the action which took a long time to clean up. Doing this DIY action job really smoothed out any remaining issues with the operation of the gun, though. I'm very pleased and look forward to lots more trigger time with my newly re-worked DW!
-Chris
June 9, 2009
Offline
Also, I meant to add for anyone else out there thinking about trying this procedure; I have very little experience with the home 'smithing thing, and while I enjoy working with my hands, I have next to no prior knowledge regarding any of the tools or processes involved. I just followed the instructions and adapted what I needed to fit the items I had at hand. Sure, it was tedious, but I wouldn't say difficult by any means. If you're thinking about trying this, don't be intimidated! And Shoot's advice to use the cleaning rod to help get out the mainspring might just be the most valuable gem in the whole article.
Chris
Dans Club
March 2, 2008
Offline
Thanks for the after action report. I have a 715 I'm going to try this on, I'm going to measure trigger pull weight before and after, and get some baseline accuracy numbers before and after.
I went to a bookstore and asked the saleswoman "Were is the Self Help Section?" She said if she told me, it would defeat the purpose.
George Carlin

Range Officer
Range Officers
Dans Club
February 9, 2009
Offline
Shoot, My 15's all are rather Ok. I plan to try this at some point. My question, have you ever tried this on a large frame? I have two candidates that really need some help. My 45-colt for one and one of the 44's are very stiff and heavy. the trigger travel is very long as well. Any thoughts?
A man cannot have too many SuperMags
Supporter
Range Officer
Range Officers
May 2, 2009
Offline
Supermagfan said:Shoot, My 15's all are rather Ok. I plan to try this at some point. My question, have you ever tried this on a large frame? I have two candidates that really need some help. My 45-colt for one and one of the 44's are very stiff and heavy. the trigger travel is very long as well. Any thoughts?
To be honest, I've never had any of the large frames apart. I'm going to do it someday (once I've got all my small frames done). My 15's feel ok also...until I reach down and pull on one that I have tuned up--night and day difference. I have the Sentinel tore apart now--just need to find time to polish it up. Best I can tell you is to replace the springs and lube it up good. Trigger travel can't be adjusted (to my knowlege).
SHOOT

December 4, 2009
Offline
<img decoding="async" class="spSmiley" style="margin:0" class="sfsmiley" title="WOW" onclick="sfjLoadSmiley('wow.gif', 'WOW', 'https://www.danwessonforum.com/wp-content/forum-resources/forum-smileys/', ' ', '1');" src="../../../wp-content/forum-resources/forum-smileys/wow.gif" alt="WOW" />https://www.danwessonforum.com/wp-content/forum-resources/forum-smileys/', '
 ', '1');" src="../../../wp-content/forum-resources/forum-smileys/worship.gif" alt="Worship" />
This is exactly what I poped in here to look for,I don't even need to ask the question.
thank you very much sir
now if I could find info on how to instal a new cylinder stop I would be set


1 Guest(s)
