
 Log In

August 29, 2009
 Offline
 1
1


The written tutorial is by Superdan. Pic's and edit by landtoy80
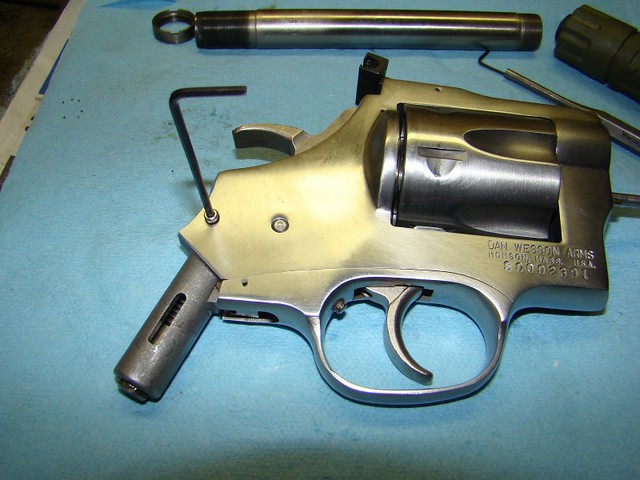
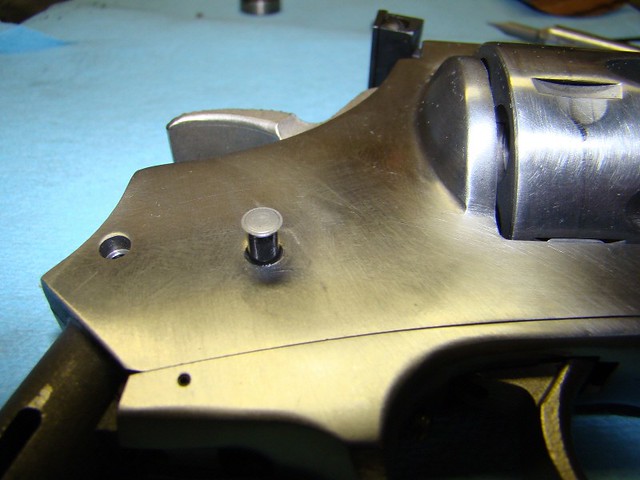
1) Once you have the grip off there is an allen head screw on the right side of the frame, take that screw out.

2) cock the hammer, screw that small screw in where the grip screw goes (it holds the mainspring) de-cock the gun.
3) you will have to at minimum screw the elevation of the rear sight screw all the way up, if not actually take the rear sight off. (I removed the windage part of the rear sight) to remove the hammer, pull the trigger back just a little bit and knock out the pin to the right
4) pull the trigger all the way back and hold it there, lift the hammer out.

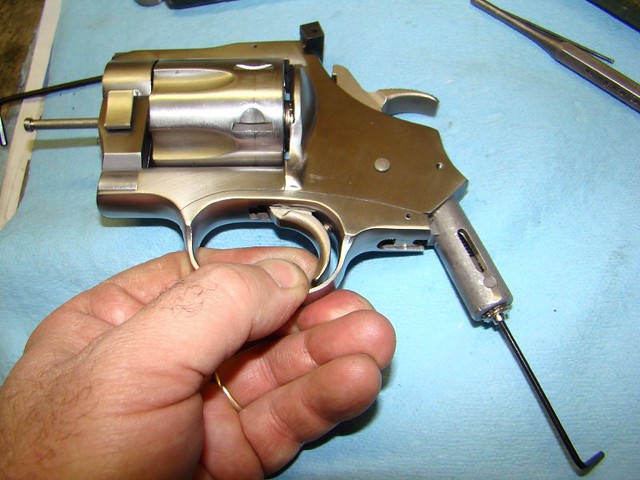
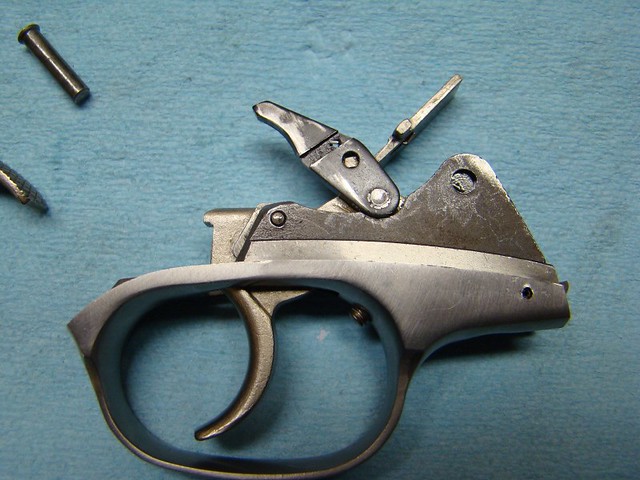
5) then flip the gun upside down and push the u shaped piece behind the trigger guard forward, pry the assembly upward

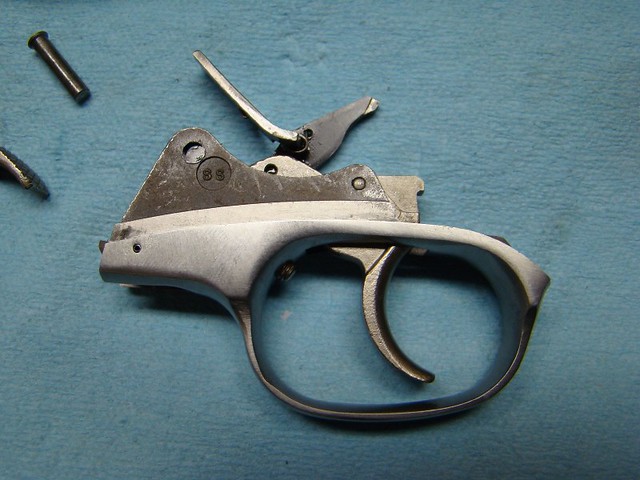
6) pull the rear part of the trigger guard down notice the notch in the front that it rocks into and  remove the entire bottom piece that holds the trigger, hand and transfer bar, pay attention to the way the transfer bar is attached to the hand, it likes to fall off and the spring is delicate)
7) then there is a "U" shaped piece up in the frame that holds the cylinder in the frame (it's in front of the cylinder bolt stop, you will want something like a dental pick to get it out if it's tight)

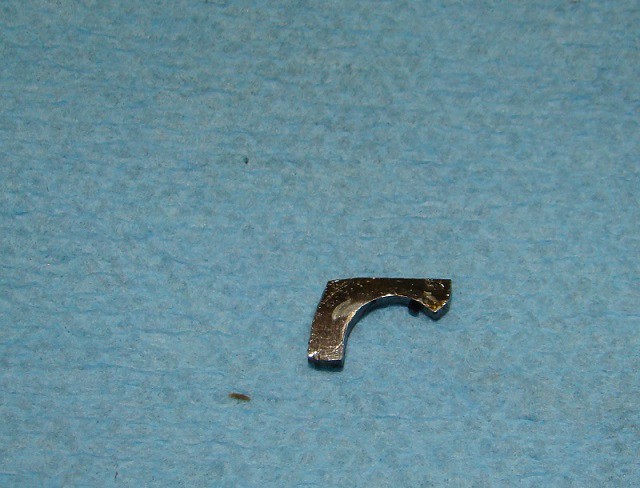
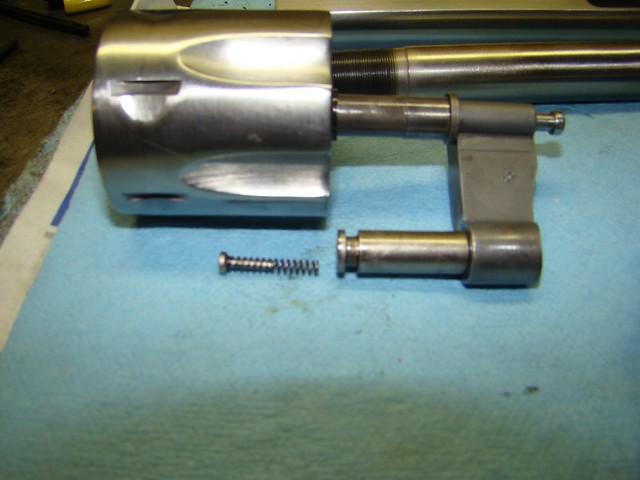
8) then remove the cylinder yoke, look at how they have the cylinder stop placed in there before you take the cylinder yoke assembly out. that's all there is to it, it sounds harder than it is.
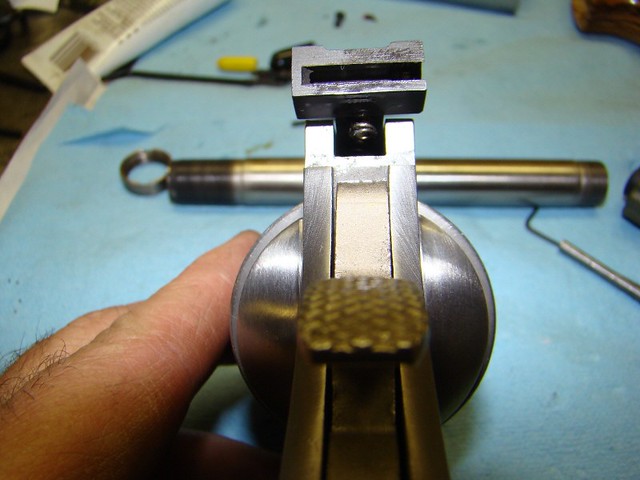
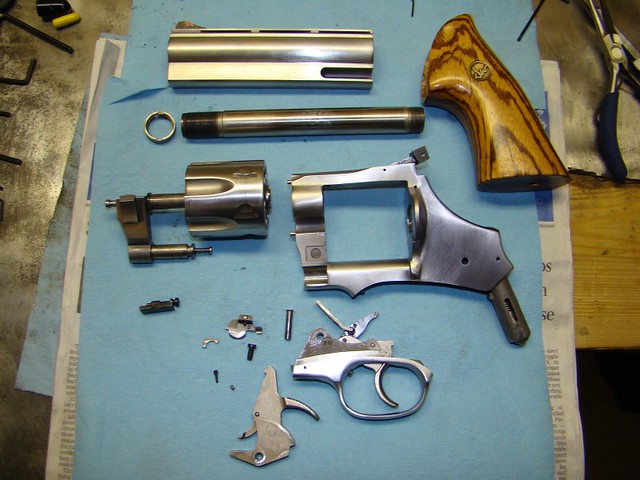
A shot of what we have removed.

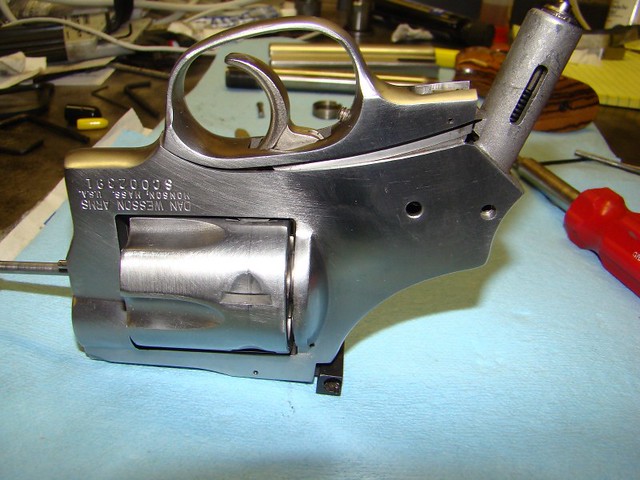
Followed by the overall large frame assembly. The only thing not removed here is the cylinder extractor rod & extractor star.
August 29, 2009
Offline
Reassembly tip: when trying to get the trigger assembly back in the
frame, pull the trigger and hold it all the way back, get the hand in
place in the frame, and from the top use a screwdriver to rock the
transfer bar into the guide in the frame as you slowly let the back of
the trigger guard down until the bar goes forward into the notch, then
rock the trigger guard into the notch on the front and latch it in the
rear. you should be able to pull the trigger and rotate the cylinder and
have the transfer bar come up into place, if it doesn't do that it's
not together correctly. it does take some time to get it your first
time, this is the hardest part of working on the large frames.
Moderator Note-Adding the following note from another Member regarding reassembly-Steve
Â
Harly said:
"Every time I pull apart a large or Supermag frame I always end up wrestling with the hand and transfer bar trying to get them both in their perspective slots. ![]()  I found a solution that seems to work pretty well. Tie the hand and transfer bar together with a piece of thread. When you position the trigger guard into place. pull the trigger about half way and everything lines right up. Latch it into place then break the thread off."Â
 I found a solution that seems to work pretty well. Tie the hand and transfer bar together with a piece of thread. When you position the trigger guard into place. pull the trigger about half way and everything lines right up. Latch it into place then break the thread off."Â
Moderator Note-adding a link to Harly's reassembly tip HERE - Charger Fan

Range Officer

Range Officers

Dans Club
February 28, 2009
Offline
Thanks landtoy80.
I hope that Jody will make this a sticky of some kind so we can easily find it again.

-Mike
Â


Dans Club
October 26, 2008
Offline
landtoy80 said:
Â
The written tutorial is by Superdan.Â
Â
Glad my Incoherent Babbling could help someone 

Supporter

Moderators
January 24, 2009
Offline
That's pretty much what I did when I took apart my .445 SM recently,
although I didn't have to mess with the rear sight to get the hammer
out. But it did take a bit of coaxing.
Great pics, thanks to both you guys for making this nice tutorial!
I moved this thread to the Gunsmithing area & pinned it, so it will be easier to find in the future.

October 12, 2009
Offline
I saved this post, but as I have retired my Gun Smith hammer I don't think I will be taking my Dan apart.
I have a natural ability to mess things up when I take them apart to try to make them better.
Â
DooM
Â


January 22, 2008
Offline
DooM,
I'm glad you bumped this post as I need to take apart my 744 so I can have the cylinder reamed.
Jody

May 12, 2011
Offline
This is great guys! I've been looking for exactly this!
Dave
December 26, 2010
Offline
landtoy80 said:
Â
2) cock the hammer, screw that small screw in where the grip screw goes (it holds the mainspring) decock the gun.
Â
I need a little help with step 2 please. Â That small screw won't screw into my grip screw threads. Â It is too small of a diameter. Â Can I just use the grip screw? Â Basically just run it all the way in? Â Thanks.
Supporter
Range Officer
Range Officers
May 2, 2009
Offline
95XL883 said:
landtoy80 said:
Â
2) cock the hammer, screw that small screw in where the grip screw goes (it holds the mainspring) decock the gun.
Â
I need a little help with step 2 please. Â That small screw won't screw into my grip screw threads. Â It is too small of a diameter. Â Can I just use the grip screw? Â Basically just run it all the way in? Â Thanks.
It doesn't go into the grip screw threads--you need to fully cock the hammer, hold it there, and run the small screw in as far as you can--this will hold the hammer spring.
SHOOT
December 26, 2010
Offline
Thanks Shoot. Â I'll give it a try in a few minutes. Â I'm a noob at most of this stuff and a little thick-headed to boot. Â I've got one successful gun repair under my belt, my son's P22. Â Hopefully this one goes as well as that one did.
July 23, 2011
Offline
is there anywere i could find these pics that have been deleted ?     Â
Â
                                                                                                                                                                      Â

February 11, 2010
Offline
This thread really is worthless without the pics ! Maybe just another
photobucket glitch and will be back on later hopefully 
Â
-Blacktop

August 4, 2011
Offline
Hello : Any chance of getting this article back with the pictures .? I will be a new Dan Wesson owner of a V744 .  Can it be emailed to me ? I would appreciate it .
Â
Regards Murray
December 26, 2010
Offline
I'm sure I've got a printed copy downstairs but have to go to work right now. Â I could copy and mail it.
August 29, 2009
Offline
I have updated the lost pic and added a pic to my pics.
I will send Charger Fan the pic's so he will have them if there is a future problem.
July 23, 2011
Offline
thanks alot thats great !!!!!!!!
February 11, 2010
Offline
Yea ! pics are back and look great, The words run off to the side -->>
now ...for me , anyway. But I can live with that
Â
-Blacktop
Supporter
Moderators
January 24, 2009
Offline
Many thanks to Landtoy, for bring back the 
I have edited the post, by relocating the pics to coincide with the text & centering them so the text will not run off the page. Let me know if I got anything in the wrong order.
I intended to upload these pics to the DWF software, but it doesn't seem to want to cooperate today. So I uploaded them as a backup to my own host site. I'll upload them to the forum software when it wants to cooperate.
Thanks again to Landtoy & Superdan, this is an invaluable tutorial.


1 Guest(s)
