
 Log In


Supporter
Range Officer

Moderators

DWF Supporters

Dans Club
December 4, 2011
 Offline


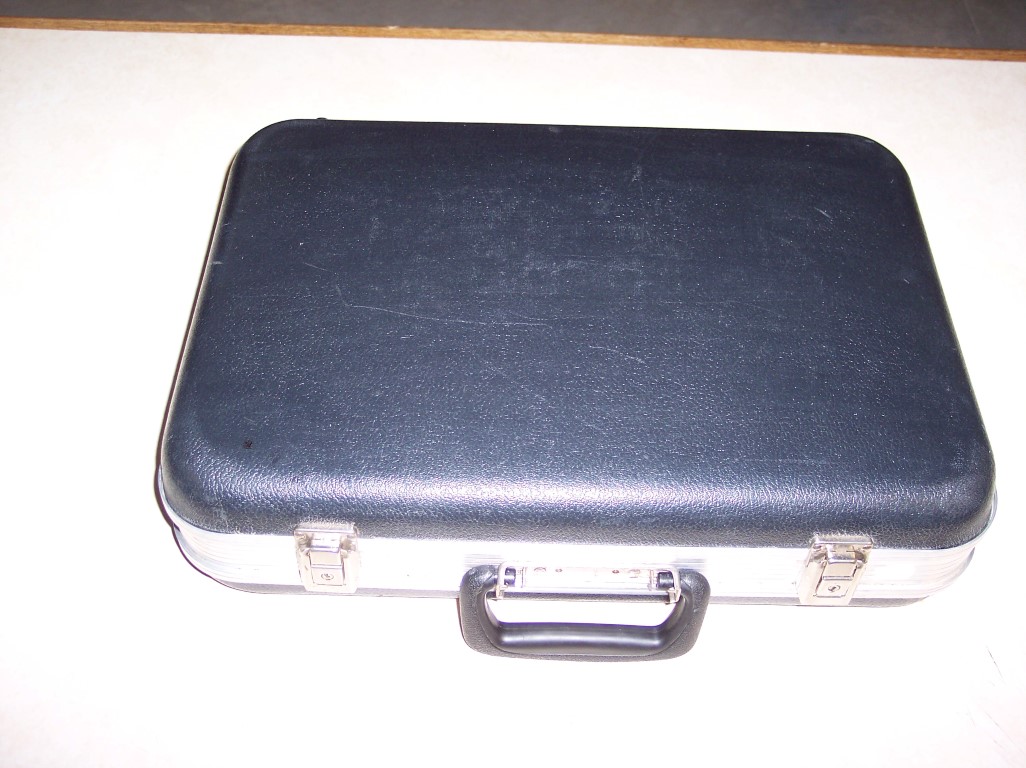
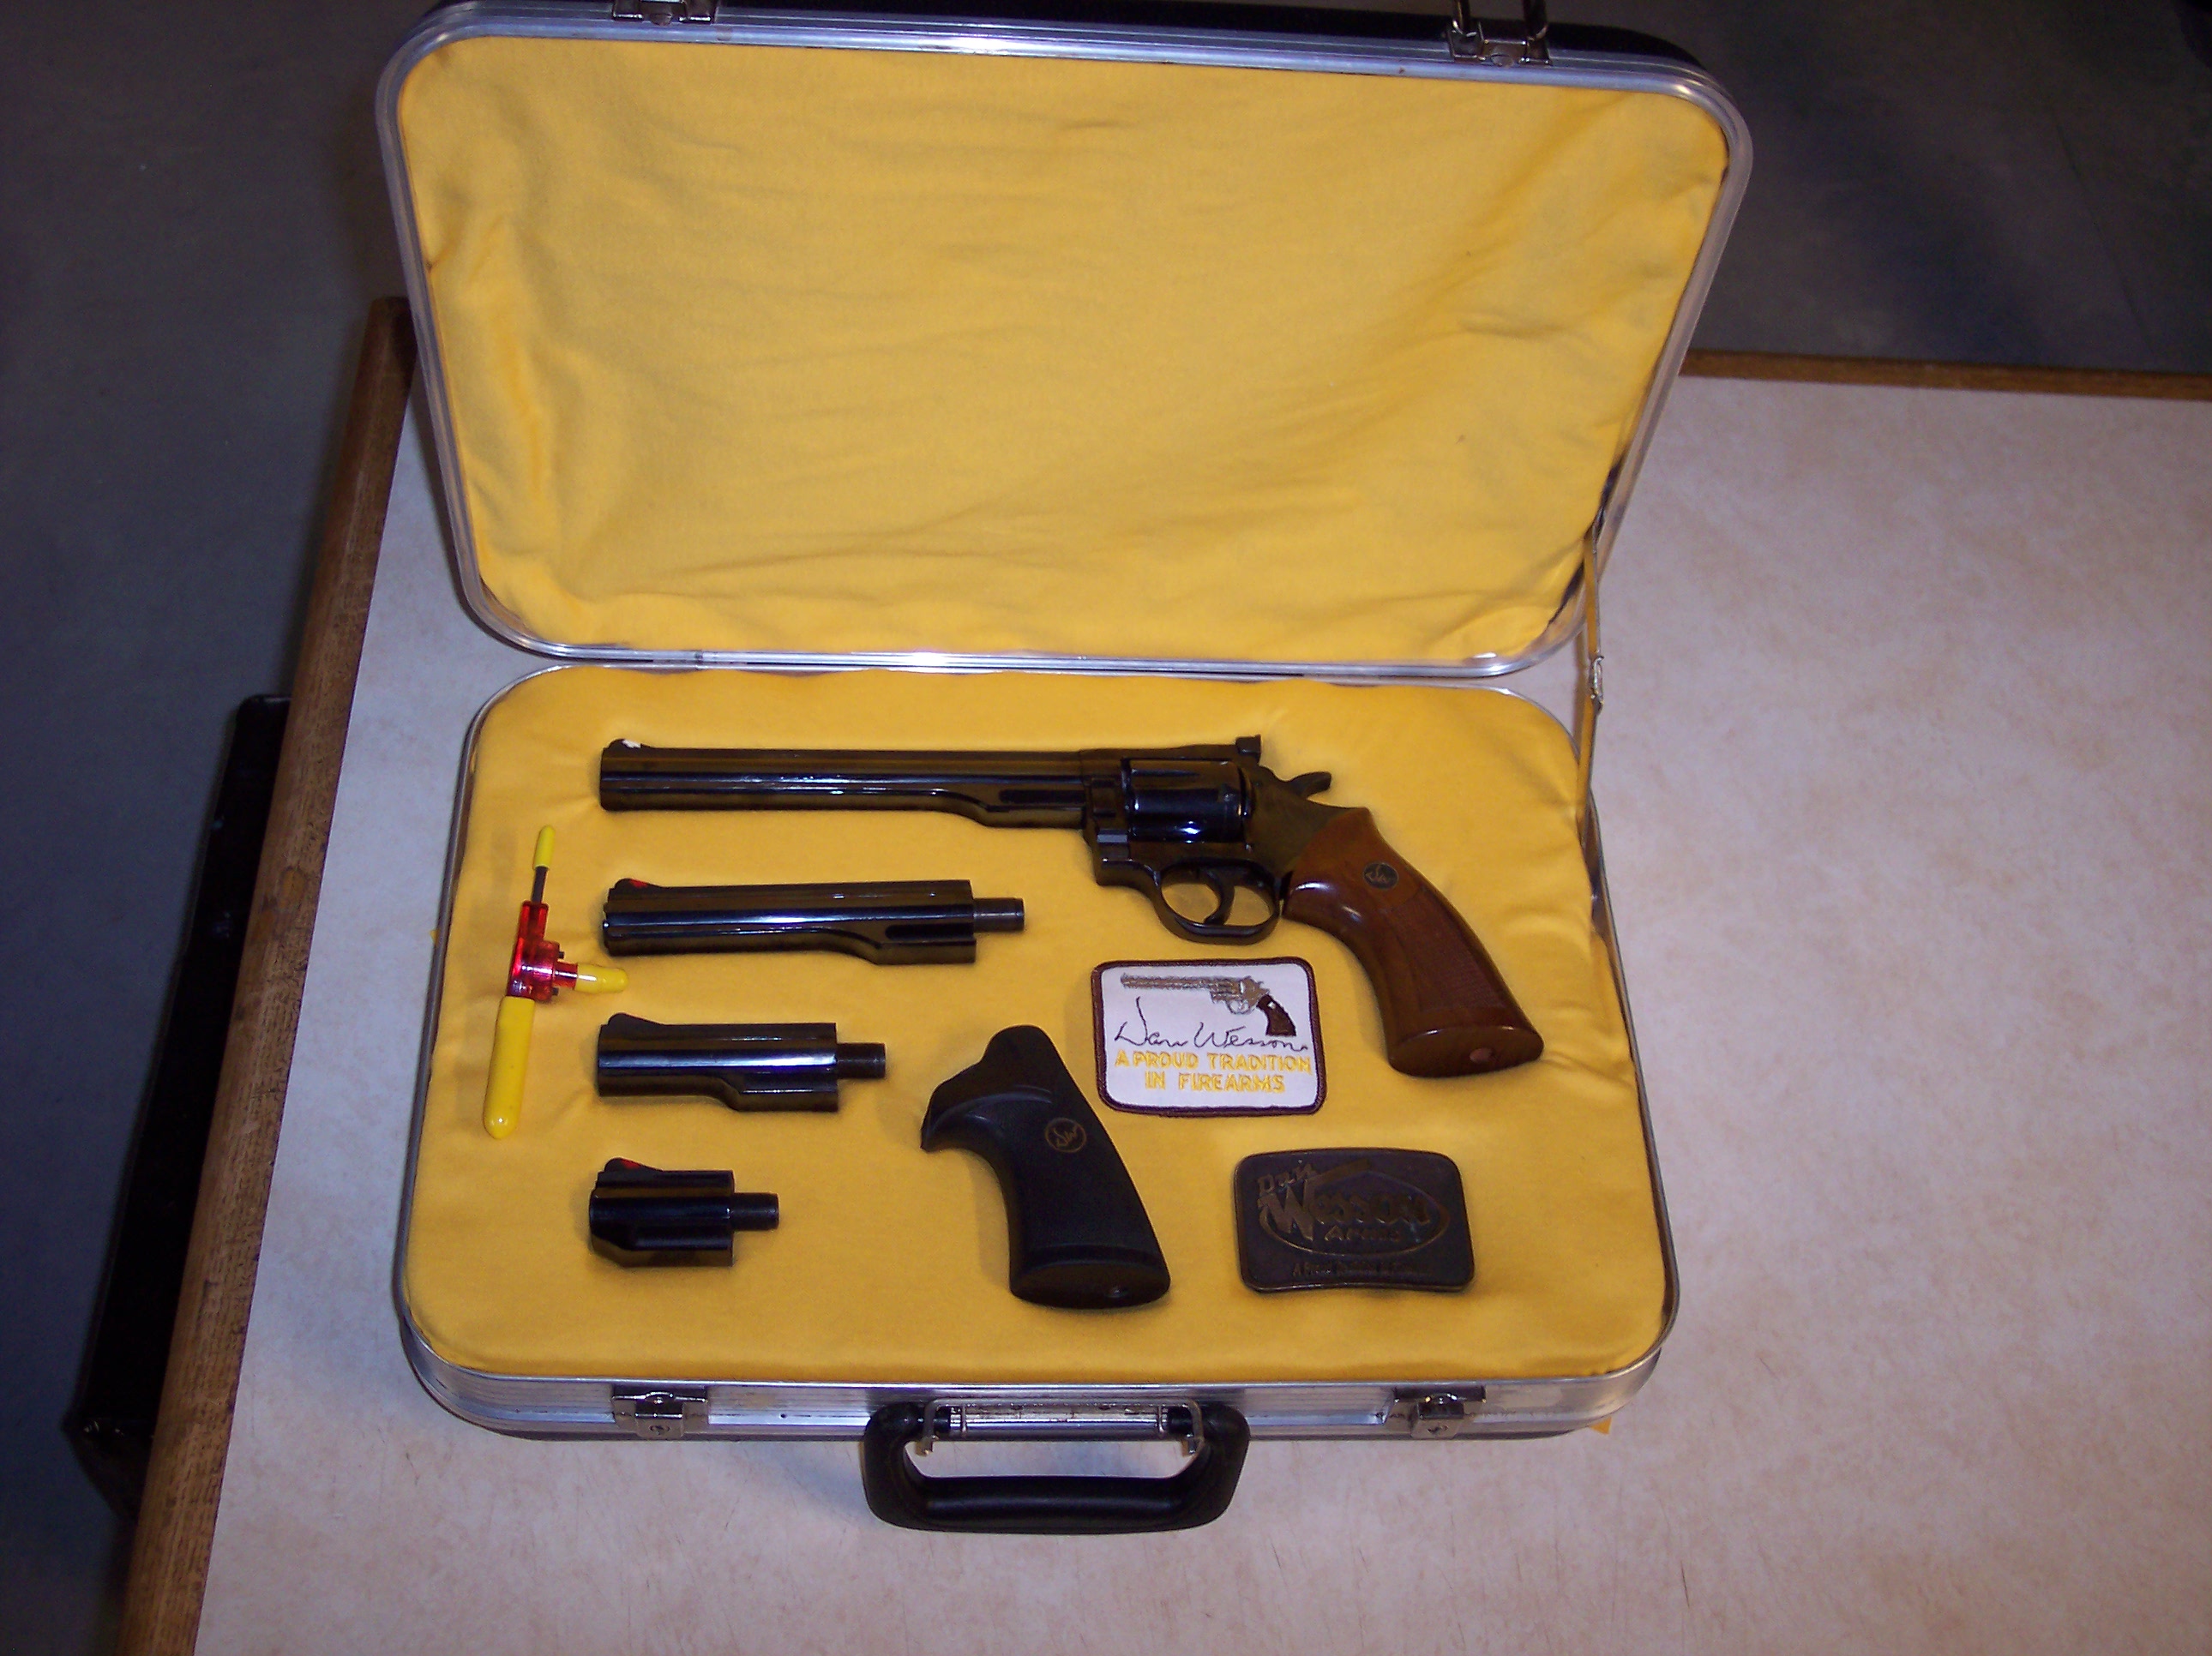
Here are some pics of my first attempt at a DIY pistol pack. I bought a used DW gutted pack and recovered the foam with some fabric I found in the discount bin at the fabric store. I'm going to try the briefcase route for my next pack, picked one up cheap on the net and going to trace the pieces on foam and cut with a sharp razor then cover with this fabric.Â
Let me know what you think.
BTW this is my 15-2
Â

Anything worth doing is worth doing well.
My father
If a man designed it, and a man built it, then a man can fix it.
My grandfather

August 29, 2009
Offline
Looks good - nice job.
July 23, 2011
Offline
looks good hope mine turns out that good .

Range Officer

Range Officers
Dans Club
February 28, 2009
Offline


May 17, 2010
Offline
Wow, thats a pretty good color for the bargin bin! Looking good!
Soap Box, Ballot Box, Ammo Box
in that order.
4Â Monson Model 15's
1 Palmer FB 15
1 Rossi 357 Model 92 (lever)
1 CZ 75B
Supporter
Range Officer
Range Officers
May 2, 2009
Offline
Very nice work  ... Now if you want to up your game a little, try to find a DWA old style patch to match the belt buckle.
SHOOT
June 25, 2011
Offline
Coulda fooled me. Nice job
Supporter
Range Officer
Moderators
DWF Supporters
Dans Club
December 4, 2011
Offline
Yea, I know, haven't found any oval patches to go with the black case and belt buckle. I need one of the "other" style buckels for the 22 as well, but they have been selling for $70 and up .  I will probablly put the 22 in the black case since its older than the 15-2.
. Â I will probablly put the 22 in the black case since its older than the 15-2.
Anything worth doing is worth doing well.
My father
If a man designed it, and a man built it, then a man can fix it.
My grandfather

Supporter
Moderators
January 24, 2009
Offline
Dang, that's some nice work, way to go!
I noticed today that there's an old style patch on eGouge, who knows where bidding will end, though.
Supporter
Range Officer
Moderators
DWF Supporters
Dans Club
December 4, 2011
Offline
Some of that minor small stuff ends up costing as much as a BA sometimes, belt buckels in particular. I guess they appeal to belt buckel collectors as well as gun guys.Â
This case has a sticker from the 357 that origionally inhabited it still attached. Do I leave it on there or do I remove it? Obviously the serial numbers don't match. Just thought I'd check on the protocol.Â
This reminds me of going to a car show where origionality nuts take points off for screw heads not all lined up in the same direction.
Anything worth doing is worth doing well.
My father
If a man designed it, and a man built it, then a man can fix it.
My grandfather
Dans Club
March 2, 2008
Offline
I think the protocol is to make it whatever you want it to be. Unless you intend to find the gun that matches the serial number on your case, the serial number on the case or not does not have much value, either way. Have fun with it.
I went to a bookstore and asked the saleswoman "Were is the Self Help Section?" She said if she told me, it would defeat the purpose.
George Carlin

January 22, 2008
Offline
It would be cool to come up with some labels the same size that we could print up. Â Maybe I'll look into that tomorrow.
Nice job!

August 29, 2009
Offline
Yep - no protocol here on this one - do what you like. Me......I'd probably peel it of though if it didn't match a gun.
Supporter
Range Officer
Range Officers
May 2, 2009
Offline
Jody said:
It would be cool to come up with some labels the same size that we could print up. Â Maybe I'll look into that tomorrow.
Nice job!
Your memory must be slipping  ... I already did it a long time ago--there is a post on the DWF somewhere about it. Mine are identical to the originals--and yes it took some work... now I have to search for the thread
SHOOT
Supporter
Range Officer
Range Officers
May 2, 2009
Offline

December 27, 2010
Offline
April 25, 2008
Offline
I think you did a great job! Looks very nice.
The Savantist

January 15, 2010
Offline
Instead of laying fabric loose over foam, I found a way to create a cloth MOLDED TO FIT insert thats soft, light, and perfectly fitted. See this photo from a 22cal DW forum photo thread.Â

See how the pistol is sunk into the cloth? Its actually a molded tight fit. No chance anything will move around inside this case when its closed no matter how much you shake it.Â
What you will be doing is placing your components on the bottom of a box, leveling them, covering them with a cloth of your choice then pouring expanding foam over the cloth and sealing it up. As the foam expands and presses the cloth down around the gun, it molds and sets solid leaving a form fitted cloth base. It takes a couple trials to get the hang of it.
How?
- You will need some 2-part foam.   Look on the internet for FROTH-PAK in the small size â they are about %50 to $80 but enough to do 3 or 4 cases. For a practice run, I recommend using cheap one part spray foam from your local hardwar store, but this will loosen up and shrink over time so its not a good permanent solution.
- Make a 2x4 frame with the same inside dimensions as your breifcase of choice. Use screws you can remove from the outside later. Use fillers, corner stock or tape to round the corners if needed but make sure its as identical as possible to the outline of the case interior. Slightly larger is better (1/4" or so) to create a tight fit. Otherwise you will be glueing the finished insert into your case.
- Get a piece of blue or pink styrofoam that is bigger than your frame. Lay it on the floor. Arrange your gun and parts on the styrofoam in a reversed/mirror image of the final layout. (Picture the pink foam sitting on TOP of your gun in the finished pistol-pak, even though we are working upside down for now.)Â
- Now scratch some fine marks in the foam to outline the components. Now you will need to hammer down the foam (or pluck, pick, knife it away) to get the parts to sit level on the foam. Doesnt have to be pretty, because this wont show up in the final product. In other words, for the pistol body to float level end to end, the cylinder will have to sink completely into the pink styrofoam.  Use clay blobs underneath parts if you need to raise portions so they are sunk deeper into the final fabric.Â
- Once the depth is OK, use masking tape to secure the parts from moving on the flat styro board. Keep the tape tucked in around parts tightly at 90 angles so the cloth can tuck around the parts close. The tape lines will not show in the final product.
- Now place the frame down on the board with all the parts in place like we are going to do a plaster cast of your gun.
- PRECAUTIONARY: Use SARAN WRAP to wrap any parts if you are concerned about chemicals, moisture, or wet foam bleeding through the cloth onto your gun. Polyurethane is impossible to remove so be careful here, especially with wood stocks. Keep it tightly taped to maintain profiles and details in the final molding. Â
- Cut your cloth to fit inside the frame with plenty extra to go up and over the sides.   FINISH SIDE DOWN against the gun, lay the cloth inside and gently tuck the cloth around the parts. Use a pen or stick to concentrate on the corners and tight spots.  Get it as well fitted around the gun and frame corners as possible with slack wherever possible. This is where picking a cloth with some stretch works wonders.  The stiffer the material, the more wrinkles you will have, but they lend their own character. I used blue velvet on mine which doesnt stretch much at all and it looks pretty nice.Â
- You should now be looking at the backside of the cloth inside our "box" draping up and over the sides with your gun at the bottom UNDERNEATH the cloth, nicely outlined like a tucked-in bedtime toddler. DO NOT anchor the cloth at the sides, so it can freely pull deeper inside as the foam expands.
- Now get a piece of wood that can cover the top of the frame and support some weight. Get some newspaper and cover the floor if you care about spillage. Set aside one sheet of newspaper. We will be foaming the inside, then covering it with paper, covering that with the lid, and weighting the lid so the foam can press down on the fabric around the gun parts as it expands. Get about 20-30 lbs of weight, a bucket of sand, bag of softener salt, whatever.
- Now apply the foam. No matter what type you are using, you must squirt within 1/2" of the fabric to ensure the stuff contacts crevaces, pockets, and inside corners and angles around the gun - without leaving gaps, bridges or air pockets underneath.  Keep the nozzle IN the foam, not over it. Go back and forth until you get one complete layer on the bottom. Then quickly add foam over that to fill almost even with the top. Quickly drape a newspaper sheet on the top as a sacrificial release barrier so the foam doesnt attach to the weighted cover. Cover and wieght it quickly and do not disturb. If you are using two part foam, this process has to be done rediculously fast, but it will be cured in about 10 minutes flat (and gets real hot). You will surely be throwing away some practice peices but they will show you areas to be improved. I cannot stress how fast you must be for 2-part foam.
- Single part foam takes at least overnight sometimes days to cure when its this thick. You should spray bottle a light mist of water in between layers of single part foam to help it do its humidity-activated cure.
- Once dry carefully take everything apart. Pry around the edges with a putty knife or unscrew the frame. Trim the excess cloth and paper away. Remove from frame and fit into your case. You may have to press and crush some corners down if you did too good a job making it too tight for the gun.
That's it. I only wish the foam was cheaper.
Supporter
Moderators
January 24, 2009
Offline
Expanding foam...I hadn't really thought of that for a gun case, so I admit it's a new angle to an old idea. Let's see, the last time I used expanding foam was in the mid-80's...on the rusty rear 1/4's of a '77 Monza, for an attempt at a quick fix & sell of the car. The foam worked great, for the week it was in my possession. 
However, for a gun case, I think I'll just stick with my 'ol tried-n-true squishy foam under cloth method. Being someone who is pushing the "50" envelope, I find myself sticking with the basics more & more...okay, if you were to ask my ex, I've been mired in the early 80's for three decades.
Anyway, for example, I like my "squishy foam under cloth" method juuust fine. Takes less time & I instantly know if I've fubar'd the foam...hehe

Â

Supporter
Range Officer
Moderators
DWF Supporters
Dans Club
December 4, 2011
Offline
I'd be afraid of getting the foam onto the gun or worse INTO the gun, talk about fubar! My experiences with two part foam aren't pretty. I replaced the flotation foam in a 26' boat a few years ago using gallons of that stuff and I can tell you several things. First, you MUST work fast, mix for one minute and pour, any longer and its expanding as you pour. Second, it gets HOT, especially if its thick, as in hot enough to blister your skin. Third, it sticks to EVERYTHING! and will get on EVERYTHING no matter how careful you are trying to be. Fourth, as it expands, it generates pressure, I doubt that even a cinderblock on top of a plywood sheet will be enough. I saw it generate enough pressure in a compartment to blow a tabbed bulkhead off the hull.Â
No, as pretty as that looks, I'm not going to chance any of my Dans to the whims of 'devils foam'.
Anything worth doing is worth doing well.
My father
If a man designed it, and a man built it, then a man can fix it.
My grandfather


2 Guest(s)
